Note: this post has been updated to reflect upgrades to CUDA 12.6, RHEL 9.4, and select packages.

Upgrade RHEL 9 to 9.4
# RHEL 9 to 9.4

# Check the current version of RHEL
cat /etc/redhat-release
sudo subscription-manager release

# List the versions available
sudo subscription-manager release --list

# Set the release version you want
sudo subscription-manager release --set 9.4

# Update
sudo dnf update

# Confirm the release version
cat /etc/redhat-release
EPEL
Extra packages for Enterprise Linux are required for getting Nvidia CUDA and NTFS support to work.
sudo subscription-manager repos --enable codeready-builder-for-rhel-9-$(arch)-rpms
sudo dnf install \
https://dl.fedoraproject.org/pub/epel/epel-release-latest-9.noarch.rpm

sudo dnf config-manager --enable epel
Docker
# Remove previous installations
sudo yum remove docker \
                  docker-client \
                  docker-client-latest \
                  docker-common \
                  docker-latest \
                  docker-latest-logrotate \
                  docker-logrotate \
                  docker-engine \
                  podman \
                  runc
# Install Docker
sudo yum install -y yum-utils
sudo yum-config-manager --add-repo https://download.docker.com/linux/rhel/docker-ce.repo
sudo yum install docker-ce docker-ce-cli containerd.io docker-buildx-plugin docker-compose-plugin
sudo systemctl start docker
# Add the current user to the docker group
sudo groupadd docker
sudo usermod -aG docker $USER
Documentation for Docker is an excellent place to start. The commands above are there
Nvidia CUDA
While not absolutely required, using a GPU is highly preferred for next-gen -omics projects like scRNA-seq and spatial transcriptomics. GPUs are optimized to run computations in parallel. This is helpful when you are trying to find relationships between tens of thousands of cells, each with tens of thousands of genes.
CUDA, or the Compute Unified Device Architecture, is a technology by Nvidia that allows software to communicate with the GPU through an common API. It is the backbone of what is powering the major advancements in “artificial intelligence” technologies over the last few years.
Getting CUDA to run properly is exactly turnkey “easy to setup and ready to go”. As always, it’s highly recommended to read the official documentation for installing CUDA. Going into the details of the installing CUDA is dependent on a variety of factors, including the Linux distribution, Kernel version, CPU architecture, etc. Below are instructions for my server, and it may likely need to be adjusted for different setups.
Check system requirements
# CUDA-Capable GPU
lspci | grep -i nvidia

# Supported Version of Linux
uname -m && cat /etc/*release

# GCC compiler installed
gcc --version

# Kernal version and CPU architecture
uname -srm
Installing CUDA
Once you have confirmed that your system is capable of utilizing CUDA technology, you can proceed to the installation.
# Installing CUDA using the local RPM installer
mkdir ~/tmp/cuda && cd ~/tmp/cuda

# Download the local installer (4.4 GB)
# If your computer does not have internet access, you can download this file on a separate machine and copy it over
wget https://developer.download.nvidia.com/compute/cuda/12.6.1/local_installers/cuda-repo-rhel9-12-6-local-12.6.1_560.35.03-1.x86_64.rpm

# Kernel headers and development packages
sudo dnf install kernel-devel-$(uname -r) kernel-headers-$(uname -r)

# Install CUDA repository
sudo rpm -i cuda-repo-rhel9-12-6-local-12.6.1_560.35.03-1.x86_64.rpm
sudo dnf clean all

# Install the cuda-toolkit
sudo dnf -y install cuda-toolkit-12-6

# Driver installer
sudo dnf -y module install nvidia-driver:open-dkms

# GPUDirect Filesystem
sudo dnf install nvidia-gds
Note: I am using the newer, open-source driver, which supports “Turning, Ampere, and forward” GPU architectures. If you need legacy support or need to switch between drivers, follow the instructions here.
After the installation is complete, you will be must reboot your computer to complete the Post Install Actions.
# Add CUDA to $PATH in your ~/.bashrc, ~/.bash_profile, ~/.bash_aliases
# For all users, you can create a shell script to load on login: /etc/profile.d/cuda.sh
sudo nano /etc/profile.d/cuda.sh

# Then add this line:
export PATH=/usr/local/cuda-12.6/bin${PATH:+:${PATH}}
# And change permissions
sudo chmod 755 /etc/profile.d/cuda.sh


### If you are using zsh, you can edit:##################
sudo nano /etc/zshenv
# And add the following:
export PATH=/usr/local/cuda-12.6/bin${PATH:+:${PATH}}
#-------------------------------------------------------

# Logout and log back in of the terminal
logout
# Confirm that CUDA has been added to $PATH
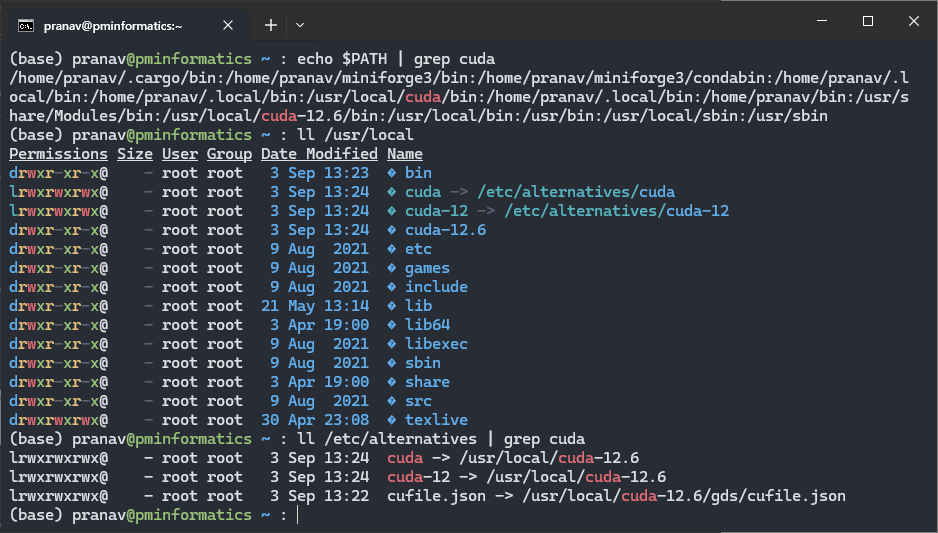
echo $PATH | grep cuda
ls -lahg /usr/local
ls -lahg /etc/alternatives | grep cuda
Nvidia uses a chain of symlinks. The TLDR is that you can have multiple versions of CUDA on your computer and switch between them by pointing the symlink to a different version.
# Start the persistance daemon
sudo /usr/bin/nvidia-persistenced --verbose
Verify Installation
cat /proc/driver/nvidia/version

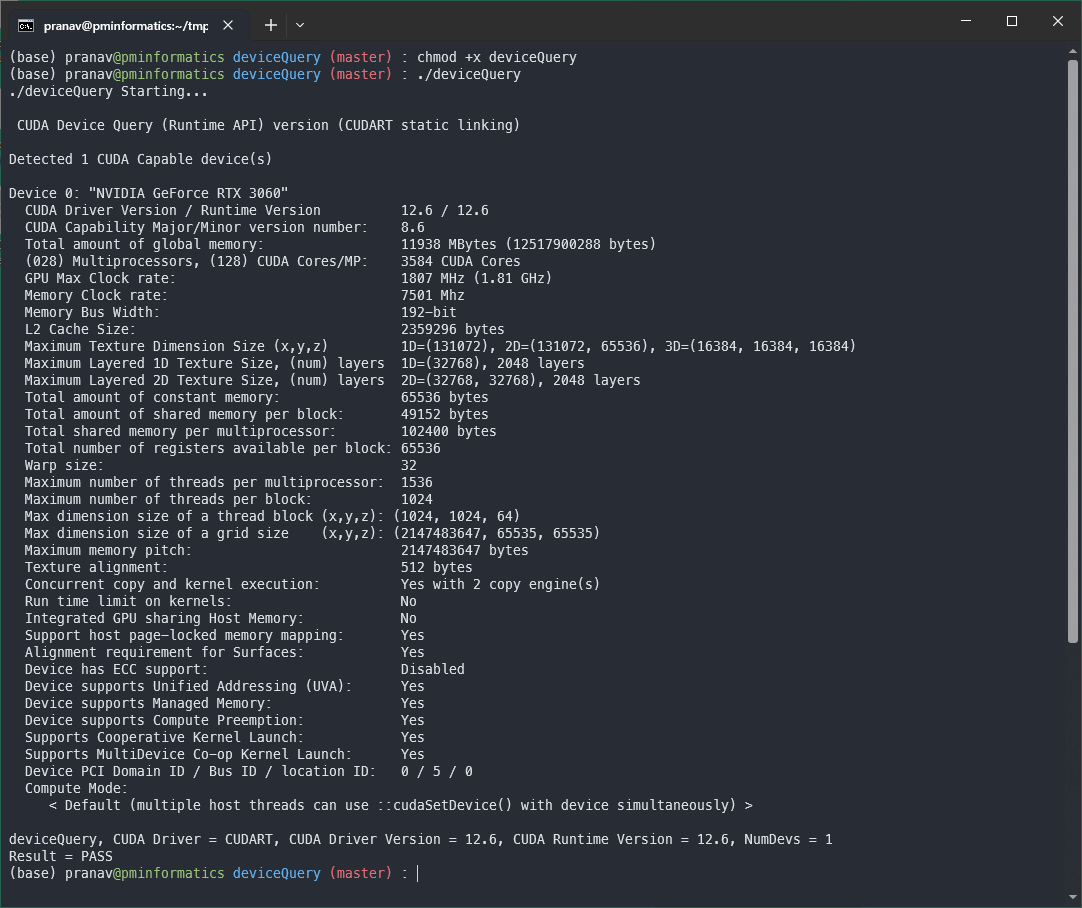
# Device Query using Nvidia CUDA Samples
cd ~/tmp/cuda
git clone https://github.com/NVIDIA/cuda-samples.git
cd ~/tmp/cuda/cuda-samples/Samples/1_Utilities/deviceQuery

make
chmod +x deviceQuery
./deviceQuery

Nvidia container toolkit
curl -s -L https://nvidia.github.io/libnvidia-container/stable/rpm/nvidia-container-toolkit.repo | \
  sudo tee /etc/yum.repos.d/nvidia-container-toolkit.repo

sudo yum install -y nvidia-container-toolkit

# Tell the container toolkit that we are using docker
sudo nvidia-ctk runtime configure --runtime=docker

# Restart docker
sudo systemctl restart docker

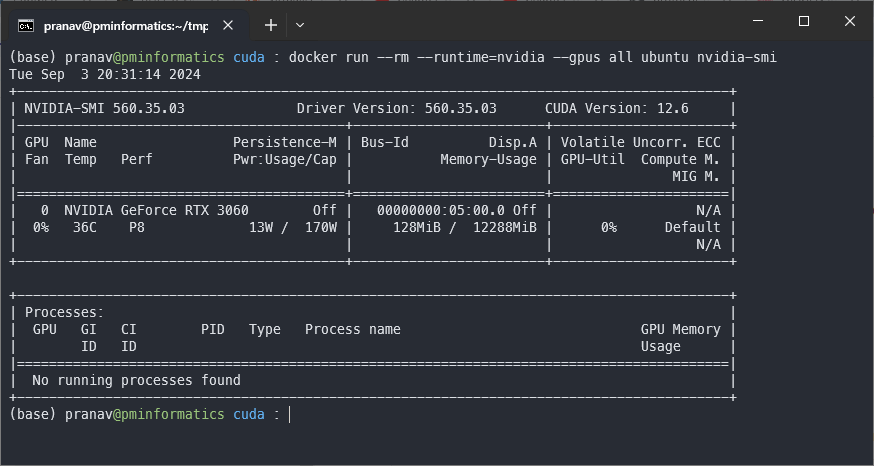
# Test your GPU passthrough to a docker container
docker run --rm --runtime=nvidia --gpus all ubuntu nvidia-smi

Optional
cd ~/tmp
wget --max-redirect=20 -O vscode-linux.rpm "https://code.visualstudio.com/sha/download?build=stable&os=linux-rpm-x64"
sudo dnf install ./vscode-linux.rpm

wget --max-redirect=20 -O code "https://code.visualstudio.com/sha/download?build=stable&os=cli-alpine-x64"
tar -xvf vscode_cli_alpine_x64_cli.tar.gz
Quarto
export QUARTO_VERSION="1.6.32" # replace with the latest version

#Download and install
sudo mkdir -p /opt/quarto/${QUARTO_VERSION}
sudo curl -o quarto.tar.gz -L \
    "https://github.com/quarto-dev/quarto-cli/releases/download/v${QUARTO_VERSION}/quarto-${QUARTO_VERSION}-linux-amd64.tar.gz"
sudo tar -zxvf quarto.tar.gz \
    -C "/opt/quarto/${QUARTO_VERSION}" \
    --strip-components=1
sudo rm quarto.tar.gz
sudo rm /usr/local/bin/quarto
sudo ln -s /opt/quarto/${QUARTO_VERSION}/bin/quarto /usr/local/bin/quarto

# Check installation
quarto check
Yadm – Managing Dotfiles
My dot files can be found on my GitHub repository: pranavmishra90/dotfiles.
curl -fLo ~/.local/bin/yadm https://github.com/yadm-dev/yadm/raw/master/yadm && chmod a+x ~/.local/bin/yadm

# My dotfiles
yadm clone [email protected]:pranavmishra90/dotfiles.git
yadm checkout ~
Eza – a modernized replacement for ‘ls’
sudo dnf install eza
Zoxide – an improvement on cd
# Zoxide
curl -sSfL https://raw.githubusercontent.com/ajeetdsouza/zoxide/main/install.sh | sh
NTFS Support
If you need access to windows partitions (NTFS) on internal / external hard drives, you need to add the package ntfs-3g
sudo yum install ntfs-3g

# Create a mount point
mkdir -p /media/pranav/DATA-3 #(my hard drive is called DATA-3)

# List hard drives. If you are having difficulty identifying which one, mount the drive using the file browser. You should be able to see something like /dev/sd____
lsblk
Add the following to /etc/fstab, replacing with the correct values from lsblk.
# Internal drives
/dev/sda2       /media/pranav/DATA-3    ntfs    defaults        0       0
Then, restart the daemon with systemctl daemon-reload
XRDP
# XRDP
sudo yum install -y xrdp
sudo systemctl enable xrdp
sudo systemctl start xrdp
echo "gnome-session" > ~/.xsession
chmod +x ~/.xsession
Node and NPM
sudo dnf module enable nodejs:20
sudo dnf install nodejs
GitHub Signed Commits
# Download and trust GitHub's GPG key
# Trusting at level 4 of 5: "I trust fully"
curl -L https://github.com/web-flow.gpg | gpg --import && printf "968479A1AFF927E37D1A566BB5690EEEBB952194:4\n" | gpg --import-ownertrust
Pipx packages
sudo dnf install pipx

pipx install pre-commit python-semantic-release
VSCode
cd ~/tmp
curl -Lk 'https://code.visualstudio.com/sha/download?build=stable&os=cli-alpine-x64' --output vscode_cli.tar.gz
tar -xf vscode_cli.tar.gz
# move the binary within your $PATH
mv code ~/.local/bin/code

# Run as a service
code tunnel service install
sudo loginctl enable-linger $USER

# Start the service
code tunnel